Posts

Showing posts from October, 2013

How To Beat Convert Pops (Special Mission) Strategy

Photo credit: Bloons wiki
Today, I will show you the strategy on how to beat convert pops on special mission on bloons tower defense. Just like regular Snake River round except every bloons are in camo mode.


Strategy: 

  •  Place Ninja Monkey (1,0) tower on the intersection of the river.
  • Build a Spike factory at the end of the course.
  • Upgrade Ninja Monkey and Spike Factory (2,2).
  • Place Spike Factory (2,2) at the end of the course.
  • Build 2 more Ninja Monkey (3,2)
  • Build at least 2 Dartling Guns (2,2)
  • Build Monkey Engineer (3,2)
  • Build Heli Pilot (3,2) and another Monkey Engineer (3,2)
Articles you may like:


    How To Beat Short Lived (Special Mission) Strategy


    Today, I will show you how to beat short lived special mission on bloons tower defense. This mission is just like ordinary Monkey Lane mission except you will loose any tower you place every 10 rounds.

    Short lived has the highest special mission reward which is $1000. I will advice not to use banana farms because you cannot use it properly before the 10 lives ends.

    Follow the photo below on the positioning of towers.

    Photo credit: bloons.wiki


    Strategy:
    •  Round 1 - Place Boomerang Thrower (0,0) towers on position 1 and 2.
    •  Round 10 - Upgrade the Boomerang Thrower (0,3) on position 1.
    • Round 19 - Place Glue Gunner (2,2) on position 3.
    • Round 23 - Ninja Monkey (0,0) on position 4.
    • Round 33 - Dartling Gun (1,1) on position 4. 
    • Round 30 - Upgrade Glue Gunner (3,2) position 3.
    • Round 45 - Place Money Village (0,1) on position 5,Upgrade Dartling Gun (2,1) on position 4, place Super Monkey (0,2) position 6. Please upgrade the super monkey as soon as you get extra cash.

    How To Beat Wizard Lord (Special Mission) - Strategy


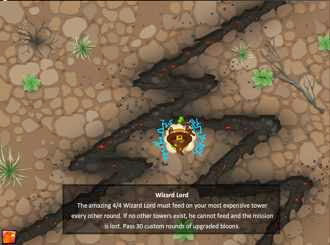
    Hi guys, today we will discuss on beating the Wizard Lord special mission on bloons tower defense. It is called Wizard Lord because it has a (4,4) upgrades and requires you to feed it every other round. 

    This freaking tower makes you sacrifice your most expensive tower every other round and it really makes me go mad (I'm sure you do too).

    Until I find this strategy guide on bloons wiki. Another thanks to them because I find the easiest and effective way to beat this Wizard Lord.

    how to beat wizard lord
    Photo credit to bloons wiki
    Just a reminder, always replace the sacrificed tower into new ones to avoid the tower shortage on later rounds.


    Strategy:
    • Round 1-8 - Build Dart Monkeys towers (0,3) as many as you can. Alternatively, 6-8 towers should be enough. This is for sacrificing purposes because dart monkeys have the cheapest upgrade available there.
    • Round 9-14 - Start building a bunch of Bombing Towers (2,2) as many as you can.
    • Round 15 - At this point, you can upgrade your bomb towers to (2,3) because you will encounter your first MOAB bloons. If you have spare money, you can add Bomb Towers (3,2) near exits.
    • Round 20 - At this point, you probably lost some lives. But keep building dart monkeys. A completed Dart Monkey Building is an advantage because of the free dart monkeys.
    • Round 22 - You can upgrade the bomb towers to (2,4) and always replace the sacrificed one! Use the Phoenix ability if you are uncomfortable on having too many bloons on the map it would definitely help.


     Just another strategy, build monkey towers as much as possible. Don't worry about the money, for sure you'll have plenty of it because you are not upgrading your towers.

    Related posts:

    How To Beat Fast Upgrades (Special Mission) Strategy


    We will discuss today on how to beat Fast Upgrades special mission on bloons tower defense. In this mission we need to survive 5 special rounds on castle where your tower upgrade once for free at the end of each round.


    Strategy: 

    • Buy Sniper Monkey tower. This may leak some bloons, if you dont want some leaks,, you can use road spikes.
    • At round 2, buy another Sniper Monkey tower (1,0). At this point, both sniper monkeys have (1,0) upgrades.
    • Round 3 - Buy Buccaneers (0,2) and place it far from entrance to prevent them from interrupting the sniper monkeys.
    •  At this point you can buy another 2 Buccaneers with (0,3) upgrades, if not so you can buy it at the middle of the round.
    • Round 4 - Buy another Buccaneers (0,3)
    • You can sell the two Sniper Monkeys if you want. Use the Buccaneer skill to defeat the red MOABS.
    • CONGRATULATIONS!!!  


    How To Beat There Can Only Be One (Special Mission) Bloons TD 5 Strategy


    In this blog post, we will discuss on how to beat There Can Only Be One special mission on bloons tower defense. In this mission, we need to defeat Bloons Circles on hard at most one of each type. Meaning you can use all the towers and agents but you can only use them once

    How to Beat There Can Only Be One in Bloons TD 5?

    To beat the "There Can Only Be One" level in Bloons TD 5, you need to get and upgrade Tack Shooter (4, 2), Spike Factory (4, 2), Laser Cannon, and Super Monkey tower (2, 3).

    Strategy:

    • Buy Tack Shooter tower (3,2).
    • Next is buy buy Spike Factory tower (3,2).
    • Save money to buy a Dartling tower (2,2) and also upgrade Tack Shooter tower to (4,2).
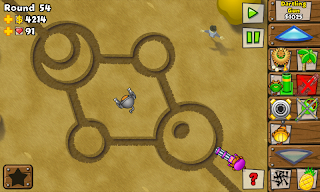
    • Upgrade Dartling towers to laser cannon and Spike Factory tower to (4,2) at the end of round 53 (see photo).

    • After round 53, you can sell some stuffs and buy Super Monkey tower (2,3)

    • After this round, you can buy whatever tower you want. But be careful on later rounds because you need to sell some towers to upgrade to the most needed one. Here's my screenshot

    Congratulations! You beat the special mission and you will get a $250 and 1 token as a reward for beating the map.

    Today we discussed the strategy on how to beat this special mission on bloons tower defense. Try to experiment on different tower combination to see what works best. See also some strategies on defeating other special missions.

    How To Beat Full House (Special Mission) Strategy


    In this tutorial, I will discuss the different strategy on how to beat Full House special mission on Bloons Tower Defense 5. This special mission is one of the easiest mission on bloons td 5.

    In this mission, you need to pass Park Path on medium with no more than 5 towers on the field on the same time. Meaning, you can use all the towers and agents but each specific tower is not more than 5.

    Monkey Village and Radar Scanner tower is useful because during the later rounds, camo bloons would be hard to deal with. It will be good strategy to place Monkey Village tower near Monkey Engineer tower.

    In this guide, there will be 3 different strategies you can use to pass this mission. Please be noted that you the upgrade paths of each tower listed on the strategies below are the required upgrade paths needed as possible. Do not add tower if not stated and wait until you reached the stated upgrade.


    Strategy 1


    • Use and place Boomerang Monkey tower for your first defense on the upper left side of the map. Be careful not to place on the loop it will cause leak. Upgrade to multi-target.
    • When there's enough cash, buy Dartling Gun tower and upgrade to (2,2).
    • Buy 2 Spike Factory tower with upgrades (3,2) and (2,2).
    • After upgrading Spike Factory tower, buy another Dartling Gun tower (2,2).
    • When there's enough cash, upgrade the first dartling tower to laser cannon. Then focus on the other one.
    • Sell the boomerang tower and max upgrade both spike factory to (4,2) and (2,4).
    • Buy another dartling tower (3,2) and finish the game.
    The summation of towers must be 3 Dartling Gun towers with (3,2) upgrades and 2 Spike Factory (4,2) and (2,4).

    Strategy 2

    • Place Monkey Buccaneer tower (3,2) on northeast of the central lake.
    • On round 28, place Monkey Apprentice (2,2) northwest of Buccaneer tower inside the 3rd ring of the track.
    • Place Monkey Village tower (2,2) between 2nd and 3rd ring of the track.
    • On round 42, upgrade the Monkey Apprentice to (3,2)
    • On round 43, place Super Monkey (2,3) tower within the range of Monkey Village
    • Do whatever you want on the later rounds.

    Strategy 3

    • Sacrifice rounds 1,2, and 3 and buy Dartling (1,1) tower where it can hit the entrance.
    • Place Monkey Buccaneer (2,2) as far upstream as possible.
    • Upgrade Dartling tower to (2,2)
    • Strategically place Monkey Ace tower (2,2) on a right position where it can hit most of the bloons.
    • Save the money to upgrade Dartling, Monkey Ace, and Buccaneer to (2,3).
    • Place Super Monkey (1,2) tower above the lake in on the second u-turn.
    • Upgrade Buccaneer to (2,4) and upgrade super monkey to (2,3).
    • You can finish the game but in the middle of round 65, you can upgrade the last upgrade of dartling tower.
    Today, I discussed 3 different strategies to pass the special mission Full House of Bloons Tower Defense. See also related articles on defeating special missions.

    How To Beat MOAB Madness (Special Mission) Strategy


    MOAB madness special mission
    Photo credit to bloons wiki
    Hey guys, today I will show you the strategy on how to beat the MOAB Madness on Bloons Tower Defense 5 Special Mission. This mission is the same as the MOAB mission on bloons tower defense 4 but on a different map.

    Having a starting cash of $50000, you need to defeat the incoming 50 MOABs in a single round. Seems impossible? Don't worry, I will discuss the easiest way to defeat this mission.


    Strategy:
    With $50000 cash, don't waste your money buying multiple Super Monkey towers. Just use 2 Monkey Aces towers with (2,4) upgrade. The strategy will be letting the MOAB bloons to almost fill the entire map then activate the first bomb. The second wave will follow and wait until the last one comes out then use the ability of the second tower. Boom! You win the game. 

    Watch this video if you are still confused.


      Alternatively, a safe and easy strategy to win this special mission on bloons tower defense is to build 2 Heli Pilots (4,2) upgrades in pursuit mode.  Today we discussed 2 different strategy on how to beat MOAB Madness on bloons tower defense. Although this strategy is for bloons td 5, it will also work on bloons td 4.  Have some time reading some strategy on how to beat other special mission on bloons tower defense. Related posts: 

    How To Beat The Rink Map On Hard

    In today's post, I will show you some strategy to beat The Rink map on hard mode. On this case, I have a fully upgraded Monkey Engineer on Specialties mode of Bloons Tower Defense 5. Here's the screenshot.


    To start the strategy guide, I only used three type of offensive tower and two supportive one. I used 4 Monkey Engineers (2,4), 1 Super Monkey (3,2), 1 Monkey Buccaneer (2,4), 3 Banana Farm (2,4), and 1 Monkey Village (2,4), 2 Monkey Village (4,2).

    Note: Numbers in the parenthesis denotes the path I choose to upgrade the towers. And for the monkey village, I made 2 different upgrades for them.


    I won't discuss the the per round sequence on building the towers. Just follow the picture above and you will have the same result. If you are asking what strategy I used on the camo bloons on  its first appearance, the answer is buy the road spikes for that one.

    Today we learned how to beat The Rink map on hard in Bloons Tower Defense. The strategy we used is just a single strategy available out there. I suggest to experiment on combining different towers to see best results.

    Have some time reading some strategy on how to beat special missions, see it here:

    Dart Monkey Upgrade


    Dart Monkey use a single dart that pops a single bloon unless upgraded. This tower is a very good starter because of its cheap price and upgrades. Each upgrade improves the power and attack speed of Dart Monkey but each path focus on either power or attack speed.


    Dart Monkey Upgrade Path 1

    • Long Range Darts - the monkey will have an additional range and green bandana. Upgrade costs $120 (Easy), $120 (Medium), $130 (Hard).
    • Enhanced Eyesight - the monkey can detect a camo bloon, additional range, and red bandana. Upgrade costs $100 (Easy), $120 (Medium), $130 (Hard).
    • Spike-O-Pult - catapult styled tower that throws spiked balls. Although loosing attack speed, each shot can pop 18 bloons. Upgrade costs $425 (Easy), $500 (Medium), $540 (Hard).
    • Juggernaut - hurls a giant unstoppable spiked ball that can pop lead bloons and excels on crushing ceramic bloons. Upgrade costs $1275 (Easy), $1500 (Medium), $1620 (Hard).


    Dart Monkey Upgrade Path 2
    • Sharp Shots - can pop 1 extra bloon per shot. Upgrade costs $120 (Easy), $140 (Medium), $150 (Hard).
    • Razor Sharp Shots - can pop 2 extra bloons per shot. Upgrade costs $145 (Easy), $170 (Medium), $185 (Hard).
    • Triple Darts - throws three darts instead of one. Upgrade costs $280 (Easy), $330 (Medium), $355 (Hard).
    • Super Monkey Fan Club - Ability: Converts up to 10 nearby dart monkeys into Super Monkey for 10 seconds. Upgrade costs $6800 (Easy), $8000 (Medium), $8640 (Hard).
    Strategy
    Use dart monkeys on earlier rounds as your strategy. Dart monkey tower has a cheap upgrades and yet very effective.

    Boomerang Thrower Upgrade

    Boomerang Thrower fires a boomerang that moves in a circle in front of the tower before returning. The best strategy using this tower is to put them in to the corner of the curves.


    Boomerang Thrower Upgrade Path 1

    • Multi-target - boomerang thrower can now pop 7 bloons each. Upgrade costs $215 (Easy), $250 (Medium), $270 (Hard).
    • Glaive Thrower - throws glaives instead of boomerangs, which is sharper, faster, and more poptastic. Upgrade costs $240 (Easy), $280 (Medium), $300 (Hard).
    • Glaive Riccochet - the glaives from this tower will automatically bounce from bloon to bloon as long as there is one close by. Upgrade costs $1065 (Easy), $1250 (Medium), 1350 (Hard).
    • Glaive Lord - creates two permanent glaives that orbit around the tower which shreds anything that touches them. Upgrade costs $7650 (Easy), $9000 (Medium), $9720 (Hard).
    Boomerang Thrower Upgrade Path 2
    • Sonic Boom - sonic boomerang can smash through frozen bloons. Upgrade costs $85 (Easy), $100 (Medium), $110 (Hard).
    • Red Hot 'Rangs - red hot boomerangs can melt lead bloons. Upgrade costs $130 (Easy), $150 (Medium), $160 (Hard).
    • Bionic Boomer - this tower replaces its arm with super strong bionic arm. Has a very fast attack speed. Upgrade costs $1235 (Easy), $1450 (Medium), $1565 (Hard).
    • Turbo Charge - Ability: Increase attack speed to hyper-sonic for 10 seconds. Upgrade costs $2550 (Easy), $3000 (Medium), $3240 (Hard).

    Sniper Monkey Upgrade

    Sniper Monkey can pop 2 layers off to bloons. With unlimited range, sniper monkey can be placed anywhere in the map. The best strategy is to put sniper monkey far from the entrance and it will shoot anything within the map. It is also a good strategy to select target strong to keep the incoming bloons balanced so the towers won't miss.


    Sniper Monkey Upgrade Path 1

    • Full Metal Jacket - shots can pop through 4 layers of bloon. Can pop lead and frozen bloons. Upgrade costs $300 (Easy), $350 (Medium), $380 (Hard).
    • Point Five Oh - shots can pop 7 layers of bloon. Upgrade costs $1870 (Easy), $2200 (Medium), $2375 (Hard).
    • Deadly Precision - extreme accuracy and muzzle velocity cause up to 18 layers of bloon to be popped per shot and enough to destroy ceramic bloon. Upgrade costs $3400 (Easy), $4000 (Medium), $4320 (Hard).
    • Cripple MOAB - bullets from this tower temporarily take out propulsion systems of MOAD class bloons which immobilizing them for a short time. Upgrade costs $10625 (Easy), $12500 (Medium), $13500 (Hard).
    Sniper Monkey Upgrade Path 2
    • Faster Firing - allows snipers to shoot faster. Upgrade costs $340 (Easy), $400 (Medium), $430 (Hard).
    • Night Vision Goggles - allows snipers to detect and shoot camo bloons. Upgrade costs $255 (Easy), $300 (Medium), $325 (Hard).
    • Semi-automatic Rifle - allows snipers to take multiple shots and attacks 3X faster. Upgrade costs $2975 (Easy), $3500 (Medium), $3780 (Hard).
    • Supply Drop - Ability: Drops a crate full of cash. Upgrade costs $10200 (Easy), $12000 (Medium), $12960 (Hard).


    Tack Shooter Upgrade

    Tack Shooter tower shoots 8 tacks that spread in all direction within its range, which can pop 1 bloon. Beside being cheap, this tower is useful on early rounds and effective on crowded bloons.

    Tack Shooter Upgrade Path 1

    • Faster Shooting - the tower shoots faster. Upgrade costs $180 (Easy), $210 (Medium), $225 (Hard).
    • Even Faster Shooting - the tower shoots faster than ever! Upgrade costs $255 (Easy), $300 (Medium), $325 (Hard).
    • Tack Sprayer - sprays out 16 tacks per hole instead of usual 8. Upgrade costs $425 (Easy), $500 (Medium), $540 (Hard).
    • Ring of Fire - upgrade to a fast firing burst tower that shoots deadly ring of flame instead of tacks. They can pop any bloons including lead bloons. Upgrade costs $2125 (Easy), $2500 (Medium), $2700 (Hard).
    Tack Shooter Upgrade Path 2
    • Extra Range Tracks - tracks fly out further than normal. Upgrade costs $85 (Easy), $100 (Medium), $110 (Hard).
    • Super Range Tracks - tacks go further than normal. Upgrade costs $190 (Easy), $230 (Medium), $245 (Hard).
    • Blade Shooter - converts the tower into a blade shooter that shoots out razor sharp blades that are harder for bloons to avoid. Upgrade costs $580 (Easy), $680 (Medium), $735 (Hard).
    • Blade Maelstrom - Ability: Covers the area in an unstoppable storm of blades. Upgrade costs $2295 (Easy), $2700 (Medium), $2915 (Hard).